Limb Alignment
Most modern risers with ILF or Formula limb fittings include some form of limb alignment adjustment. While the exact mechanisms vary across manufacturers, the goal remains the same - to ensure that the bowstring runs perfectly through the centerline of the bow.
Why Alignment Matters
Correct limb alignment is one of the foundations of consistent and accurate shooting. When the string is aligned with the center of the riser, limbs, and stabilizer, you benefit from:
- predictable and repeatable arrow flight
- reduced lateral nocking point movement
- improved tuning stability and forgiveness
What Does the Adjustment Look Like?
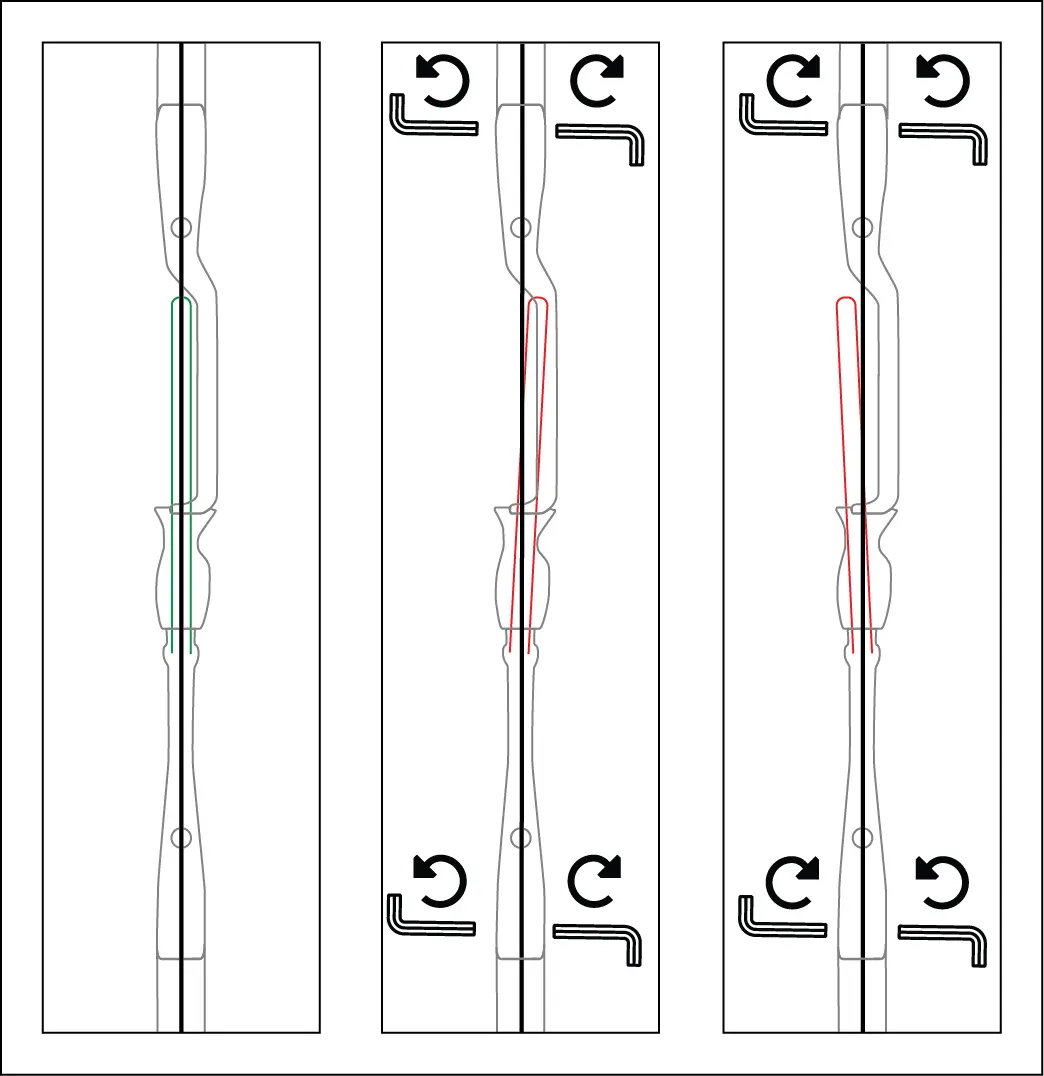
Most risers have limb alignment bolts or grub screws on either side of the limb pocket. By loosening one side and tightening the other, you can slightly shift the position of the limb in the riser — left or right.
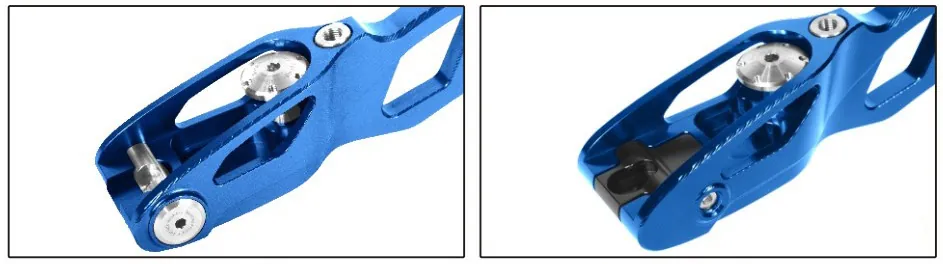
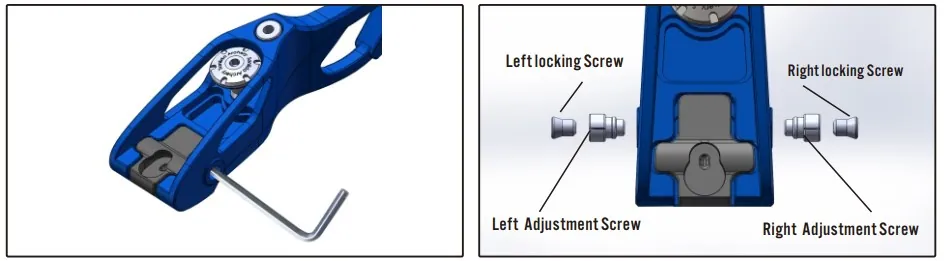
What You’ll Need
To properly check and adjust limb alignment, prepare the following:
- A stabilizer — used as a visual axis reference
- Limb center marks — to observe the relationship between the limbs and the string
You can use dedicated limb alignment stickers or tools:
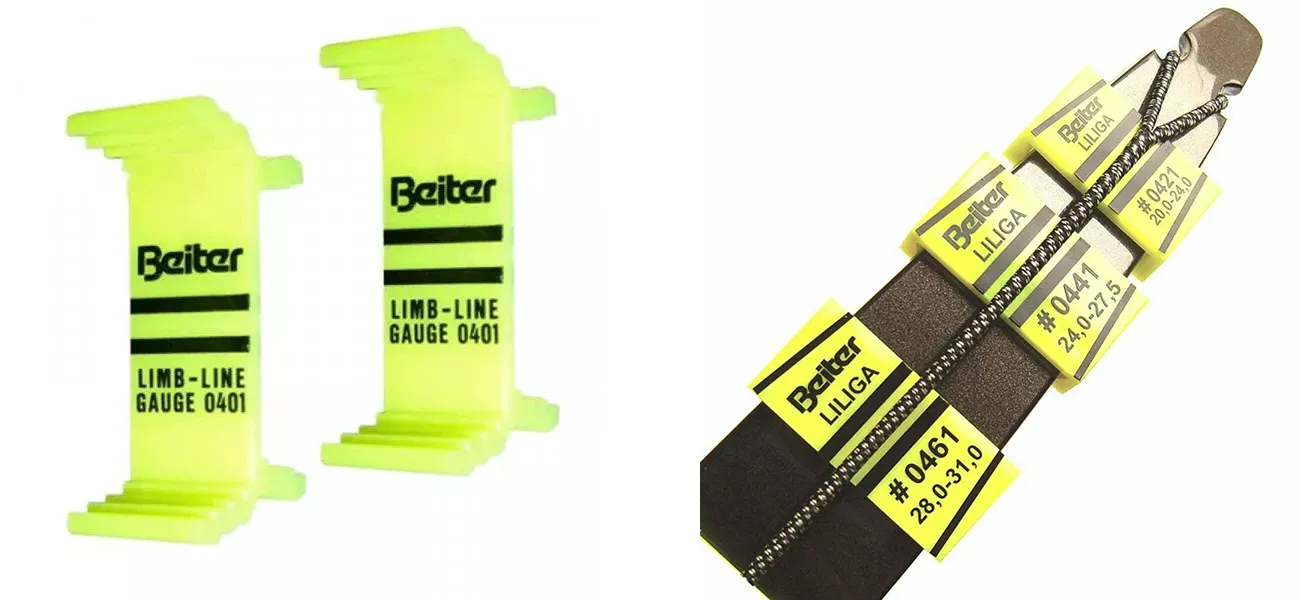
Or simply apply paper tape to the limbs and mark the centers manually with a ruler.
Pro tip: mark the exact center line and also draw two additional lines 2–3 mm to the left and right of it. These help with visual reference.
Step 1: Assess the Current Alignment
- Assemble your bow and attach the stabilizer
- Hold or mount the bow so that you’re looking directly along the string
- Align the string visually with the stabilizer shaft
- Look up and down along the bow:
- The string should pass through the bolt holes (top and bottom)
- It should also align with the center marks on both limbs
If the string drifts off to one side or isn’t parallel to the stabilizer, you’ll need to adjust.
Step 2: Making Adjustments
Only adjust limb alignment on a fully assembled bow if your riser is designed to allow this safely.
General rules for adjustment:
- Make changes in small increments — no more than a half turn at a time
- Keep both adjustment screws slightly tensioned at all times: loosen one side slightly and immediately tighten the other side to maintain consistent pressure
Stage 1 — Limb-to-limb alignment
First, align the limbs relative to each other:
- Look at the bow straight on
- Visually align the string with the bottom bolt hole, and check where it sits relative to the top bolt hole
- If the string passes left of the top bolt, then the top limb needs to be shifted to the right, and vice versa
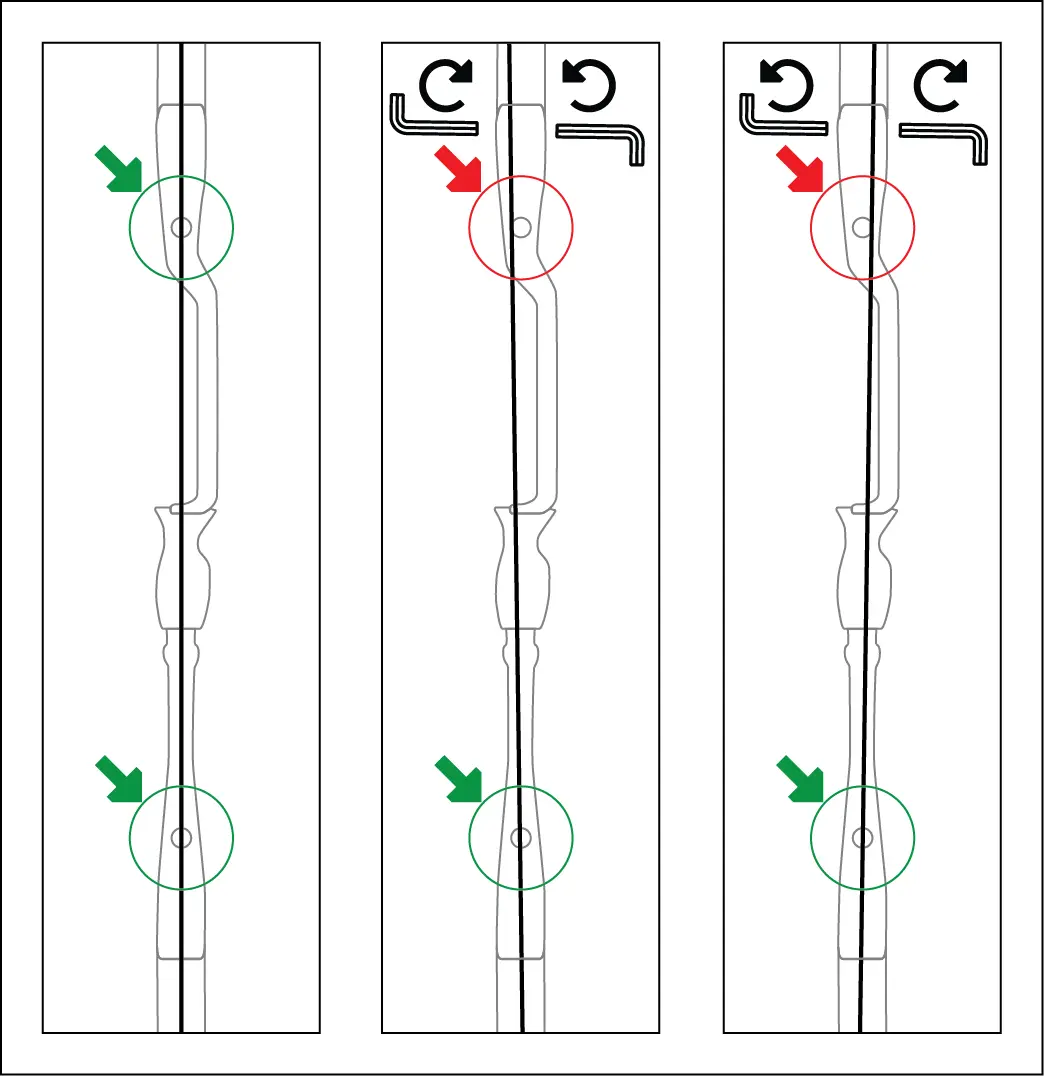
It doesn’t matter whether you use the top or bottom hole as your anchor — what matters is getting both holes and the limb centerlines to line up with the string.
Stage 2 — Centering the Bow
Once the limbs are in line with each other, compare the string position to the stabilizer.
- If the string is left of the stabilizer, shift both limbs to the left
- If the string is right, move both limbs to the right
Final Check
Once you’re happy with the alignment, make sure all adjustment and locking screws are snug and secure. Loose bolts can undo your work or create unwanted limb movement during the shot.
In Summary
Limb alignment is not something you adjust every day, but it’s crucial in certain situations:
- When changing limbs
- If your arrows behave inconsistently despite perfect form
- Before tournaments or tuning sessions
Take the time to dial it in — your bow will feel more balanced, and your shots will be more repeatable.